Thermostatic valve problems can be a real inconvenience, especially during the winter months when you need your heating system to be working at its optimum. They are a key part of a heating system, and when they’re not working correctly, you won’t be getting the warmth that you need.
Almost all types of radiators have a TRV to automatically control the flow of hot water to individual radiators. So when they go wrong, the flow of water can be erratic. You don’t want a boiling hot rad in the middle of summer or a freezing cold one in winter. Here, the experts tell you what signs to look out for and how to deal with them.
Gordon Chalk and Alan Houghton
Working in the industry for over 15 years Gordon and Alan’s mission is to help property owners get warmer and more comfortable with underfloor heating and proper floor screed.
What is a TRV?
A Thermostatic Radiator Valve (TRV) is a self-regulating valve fitted to a radiator. Gordon Chalk and Alan Houghton, MDs at Next Level Underfloor Heating and Screed Solutions, explain how a TRV works. “A TRV controls the amount of hot water flowing through it, and therefore the heat output, based on the room temperature.”
They go into more detail, “a TRV works by sensing the air temperature around it. If the room temperature is below the setting on the valve, the valve opens, allowing hot water to flow into the radiator. As the room temperature rises, the valve gradually closes, reducing the flow of hot water. When the room reaches the desired temperature, the valve closes completely, shutting off the flow of hot water.”
Anatomy of a thermostatic valve
To help understand the problems that can occur with a TRV, Chalk and Houghton explain the different parts that make up a Thermostatic Radiator Valve. A typical TRV consists of the following:
Valve body The main housing of the valve connects to the radiator and the heating system pipes.
Sensor head Contains a temperature-sensitive element (typically a wax capsule or gas-filled bellows) that expands or contracts in response to temperature changes.
Adjustable head/dial Allows the user to set the desired room temperature.
Valve pin Connects the sensor head to the valve body and controls the flow of hot water.
Lockshield valve A manual valve on the opposite side of the radiator is used to balance the system. While technically not part of the TRV, it works in tandem.
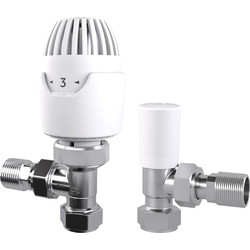
An everyday 15mm angled TRV that features a liquid sensor for faster response times. Comes with six setting numbers and 8°C frost protection.
Standard budget-friendly PTFE tape for wrapping around threads to create a tight waterproof fit for fittings on pipework. Invest in multiple rolls of tape for future use.
Maxpower Adjustable Wrench Set
This set includes four spanners that range from 150 mm to 300 mm making them ideal for plumbing and DIY projects.
Common TRV problems
There are several issues that typically affect a TRV. Here, Chalk and Houghton point out the common ones.
Valve head stuck This is the most common issue. The valve pin can become stuck in either the open or closed position, preventing the TRV from regulating the temperature properly.
TRV not heating up Sometimes, there can be a buildup in the valve, which in turn prevents water from flowing through the valve.
TRV set too low It may sound silly, but often a reason that a TRV isn’t working is that it’s set to a low number.
Air lock Air trapped in the radiator can prevent it from heating up properly, even if the TRV is functioning correctly.
Incorrect setting Homeowners may not be using the TRV correctly or have it set to the wrong temperature.
TRV set to the same temperature Sometimes people do not understand that having the TRV set to the same level as the temperature dial renders the TRV useless.
Tell-tale signs a TRV is not working correctly
A TRV may not be working properly, but if you don’t know the signs to look out for, you can end up with expensive and unnecessary repairs. Here, Chalk and Houghton outline some common signs to help you identify potential issues.
Radiator always on The radiator is constantly hot, even when the room temperature is well above the TRV setting.
Radiator always off The radiator never heats up, even when the room is cold and the TRV is set to a high setting.
Radiator only partially heating The radiator is only warm at the top or bottom, indicating a circulation problem or airlock.
Room temperature not matching TRV setting The room temperature is consistently different from the temperature set on the TRV.
Stuck valve pin You can manually push in the pin to check and see if it’s stuck.
Temperature fluctuations There is no consistency in the temperature of a radiator. You need to check the issues above.
How to fix a thermostatic valve
When a problem has been identified, it needs to be fixed. This is typically a simple solution that you can do yourself. If it can’t be fixed, it will need to be replaced. Here, Chalk and Houghton reveal quick ways to sort the problem.
Freeing a stuck valve pin Remove the TRV head and gently tap the valve pin with a hammer. Use pliers to gently pull and push the pin to loosen it. A squirt of WD-40 can help.
Bleeding the radiatorUse a radiator key to release any trapped air from the radiator.
Balancing the system Adjust the lockshield valve on each radiator to ensure that hot water is distributed evenly throughout the system.
Checking the TRV setting Ensure the TRV is set to the desired temperature and that it is not obstructed by furniture or curtains.
Replacing the TRV head If the TRV head is faulty, it may need to be replaced.
FAQs
Can I replace a TRV myself?
Replacing a TRV is a job that a competent DIYer can tackle without too much hassle. But there are a few essential tools needed and a few simple rules to follow. Chalk and Houghton point out the tools you’ll need: “You will need a radiator key, like this Radiator Bleed Key Solid Brass Clock Key from Amazon, an adjustable wrench, a pipe freezing kit, like this Arctic Hayes Aero Pipe Freezing Kit from Toolstation, (if you’re not draining the system), a new TRV, PTFE tape and a bucket and cloth to catch any water
Chalk and Houghton reveal a trick to change a TRV without draining the entire heating system. “You can use a technique called ‘freezing the pipes’, where you temporarily freeze the water in the pipes near the TRV to create an ice plug, preventing water from flowing out when you remove the old TRV. This should only be attempted by experienced DIYers!” But be warned, it requires some skill and quick work. Check out our How to fit a thermostatic radiator valve guide for more insight.
How much does it cost to replace a TRV?
A TRV is an inexpensive item, as Chalk and Houghton reveal, “Typically they are £10 – £40 each. Basic models typically start at under £10, with mid-range options (standard finishes) priced between £15 and £35.”
If you’re not confident in changing a TRV yourself, consider hiring a professional. Labour costs are around £50 – £70 per hour for standard jobs. However, emergency, weekend, or big-city-based work can push rates to £70 – £100 per hour.
If replacing a TRV, it’s a good opportunity to spruce up the radiator and surrounding areas. Start by painting the wall, following our how to paint behind a radiator and how to paint a radiator guides, to give the area a fresh new look. If you don’t want to paint a radiator, check out our radiator cover ideas for inspiration.
View the original article and our Inspiration here


Leave a Reply